Kubernetes Quick Start
Deploy Solace Agent Mesh Enterprise on Kubernetes in ~10 minutes using Helm with zero required configuration.
This Quick Start uses embedded Solace broker, PostgreSQL, and SeaweedFS with authentication disabled. It is designed for evaluation and testing only. Do not use in production. See Production Kubernetes Installation for production-ready deployments.
What You'll Deploy:
- Agent Mesh Core (orchestrator, platform services, WebUI)
- Embedded Solace PubSub+ broker
- Embedded PostgreSQL database
- Embedded SeaweedFS object storage
- All accessed via
kubectl port-forward(no Ingress/LoadBalancer)
Prerequisites
Kubernetes Cluster Requirements
Node Requirements
Use a node with 6 vCPU / 8 GiB allocatable RAM. This accommodates Kubernetes system components, CPU/memory bursts during agent operations, Helm upgrade headroom, and resource limits.
If your cluster does not meet the CPU or memory requests, the scheduler reports which pod could not be placed and why. The error identifies the specific unmet resource (for example, 0/1 nodes are available: Insufficient cpu), not a generic installation failure.
Node Instance Examples:
- ARM64 (better price/performance): AWS
m8g.xlarge, AzureStandard_D4ps_v6, GCPc4a-standard-4 - x86_64: AWS
m8i.xlarge, AzureStandard_D4s_v6, GCPn2-standard-4
Cluster Requirements:
- Kubernetes version 1.20 or later
- Host
nofilelimit ≥ 1,048,576 — required for Solace broker startup. Cloud Kubernetes nodes meet this by default; local Kubernetes clusters may not. See Solace broker open-file requirements for details, or how to fix this for local clusters.
Image Registry Configuration
By default, all images (including embedded components) pull from Solace's GCR registry (gcr.io/gcp-maas-prod). This requires a GCR credentials file provided by Solace.
Default Embedded Component Images
| Component | Repository | Tag | Full Image Reference |
|---|---|---|---|
| PostgreSQL | postgres | 18.0-trixie | gcr.io/gcp-maas-prod/postgres:18.0-trixie |
| SeaweedFS | chrislusf/seaweedfs | 3.97-compliant | gcr.io/gcp-maas-prod/chrislusf/seaweedfs:3.97-compliant |
| Solace Broker | solace-pubsub-enterprise | 10.25.0.193-multi-arch | gcr.io/gcp-maas-prod/solace-pubsub-enterprise:10.25.0.193-multi-arch |
The chart inherits global.imageRegistry for all components automatically. No additional configuration needed unless using a custom registry.
GCR Credentials File
Solace provides a JSON credentials file for authenticating with the GCR registry. Before using it, verify the file is in the expected dockerconfigjson format:
{
  ".dockerconfigjson": "<base64-encoded-auth>"
}
Command-Line Tools
kubectlconfigured to access your cluster- Helm 3.0 or later
If you're evaluating SAM on a local cluster rather than a cloud-managed Kubernetes service, review the Local Kubernetes troubleshooting section before proceeding — there are known issues that can cause silent failures.
Step 1: Install with Zero Configuration
Download the Helm chart from the Solace Product Portal. The GCR credentials file is provided separately by Solace. Once you have both, run:
helm install sam /path/to/charts/solace-agent-mesh-<version>.tgz \
  --namespace sam \
  --create-namespace \
  --set-file global.imagePullKey=sam-pull-credentials.json
The chart defaults are optimized for quickstart evaluation. No values file is needed beyond the credentials. After installation completes, the terminal displays post-install instructions including the port-forward command and the URL to access the Console UI.
Note: By default, Helm pre-install checks are run before any workload pods are created. If they fail, you will see an installation error. See Helm pre-install check failed for how to view the logs.
What gets deployed (chart defaults):
- Embedded Solace broker - Pre-configured message broker for evaluation (
global.broker.embedded: true) - Embedded PostgreSQL - For session and artifact storage (evaluation only, NOT production-grade)
- Embedded SeaweedFS - For file storage (evaluation only, NOT production-grade)
- Service type: ClusterIP (accessed via port-forward)
- RBAC authorization: Disabled (
sam.authorization.enabled: false) - OIDC authentication: Disabled (no login required)
- Session secret: Auto-generated and preserved across upgrades
Step 2: Wait for Installation to Complete
Wait for all pods to be ready:
kubectl get pods -n sam -l app.kubernetes.io/instance=sam -w
Press Ctrl-C after all pods show Running status.
Step 3: Access the WebUI
Port-forward the Console UI:
kubectl port-forward -n sam svc/sam-solace-agent-mesh-core 8000:80 8080:8080
This forwards both the WebUI (port 80) and Platform API (port 8080).
Open your browser to:
http://localhost:8000
First-Time Model Configuration
On first login, the Model Configuration UI prompts you to configure your LLM provider.
Getting Started with Agent Mesh
- Access the Console UI
- Configure your LLM models via the UI prompt. After saving, navigate to Chat in the left sidebar to start using Agent Mesh.
- Send your first chat message to the orchestrator
- Build a custom agent via Agent Builder
- Deploy your agent
- Chat with your deployed agent
What's Next?
Explore Agent Mesh Features
Now that your quickstart installation is running, explore Agent Mesh capabilities:
- Agent Builder - Create custom agents with specialized capabilities
- Multi-Agent Workflows - Deploy multiple agents that collaborate
- Platform Services - Connect agents to external APIs and services
- Gateways - Integrate with Slack, Teams, or other messaging platforms
See the main Enterprise documentation for detailed feature guides.
Moving to Production
When ready for production, see the Production Kubernetes Installation guide for complete deployment guidance, including external broker and datastore configuration, authorization, TLS, and the upgrade path from this quickstart.
The embedded PostgreSQL, SeaweedFS, and Solace broker are designed for evaluation only. They lack high availability, backup/restore capabilities, and proper resource limits for production workloads.
Troubleshooting
Helm pre-install check failed
Agent Mesh runs a set of pre-flight validation checks (collectively called sam-doctor) before any workload pods are created. These checks catch environment misconfigurations up front. By default sam-doctor is enabled (samDoctor.enabled: true) and a failing check blocks helm install and helm upgrade with an error like:
Error: INSTALLATION FAILED: failed pre-install: 1 error occurred:
    * job <release>-<chart-name>-sam-doctor failed: ...
To see the diagnostic report, view the job's logs (the job name appears in the helm error above):
kubectl logs job/<release>-<chart-name>-sam-doctor -n <namespace>
For example, for the solace-agent-mesh chart with helm install sam --namespace sam:
kubectl logs job/sam-solace-agent-mesh-sam-doctor -n sam
The report lists each check with a PASS, WARN, FAIL, or SKIP status and a reason for any failure.
Bypassing the check
To demote failures to warnings and always proceed, set the following in your Helm values:
samDoctor:
  failOnError: false
To skip the hook entirely, set the following in your Helm values:
samDoctor:
  enabled: false
Post-install health checks
If something looks wrong after accessing the Console, verify Agent Mesh is healthy:
curl -s http://localhost:8000/health
curl -s http://localhost:8080/api/v1/platform/health
Both endpoints should return a successful response when Agent Mesh is running correctly.
For detailed health check configuration, see Health Checks.
Common Issues
Pods not starting:
- Check pod status:
kubectl get pods -n sam - View pod logs:
kubectl logs -n sam <pod-name> - Describe pod for events:
kubectl describe pod -n sam <pod-name>
Insufficient resources (FailedScheduling: Insufficient cpu or Insufficient memory):
If pods fail to schedule during installation or when deploying agents, increase the resources allocated to your cluster. For example, if using Colima:
colima stop && colima start --cpu 10 --memory 16 --disk 100
Port-forward connection issues:
- Verify service exists:
kubectl get service -n sam sam-solace-agent-mesh-core - Check that all pods are Running:
kubectl get pods -n sam - Ensure no other process is using ports 8000 or 8080 on your local machine
UI loads but shows errors:
- Verify both ports are forwarded (8000 for UI, 8080 for Platform API)
- Check browser console (F12) for specific error messages
- Ensure you're accessing
http://localhost:8000(port must match)
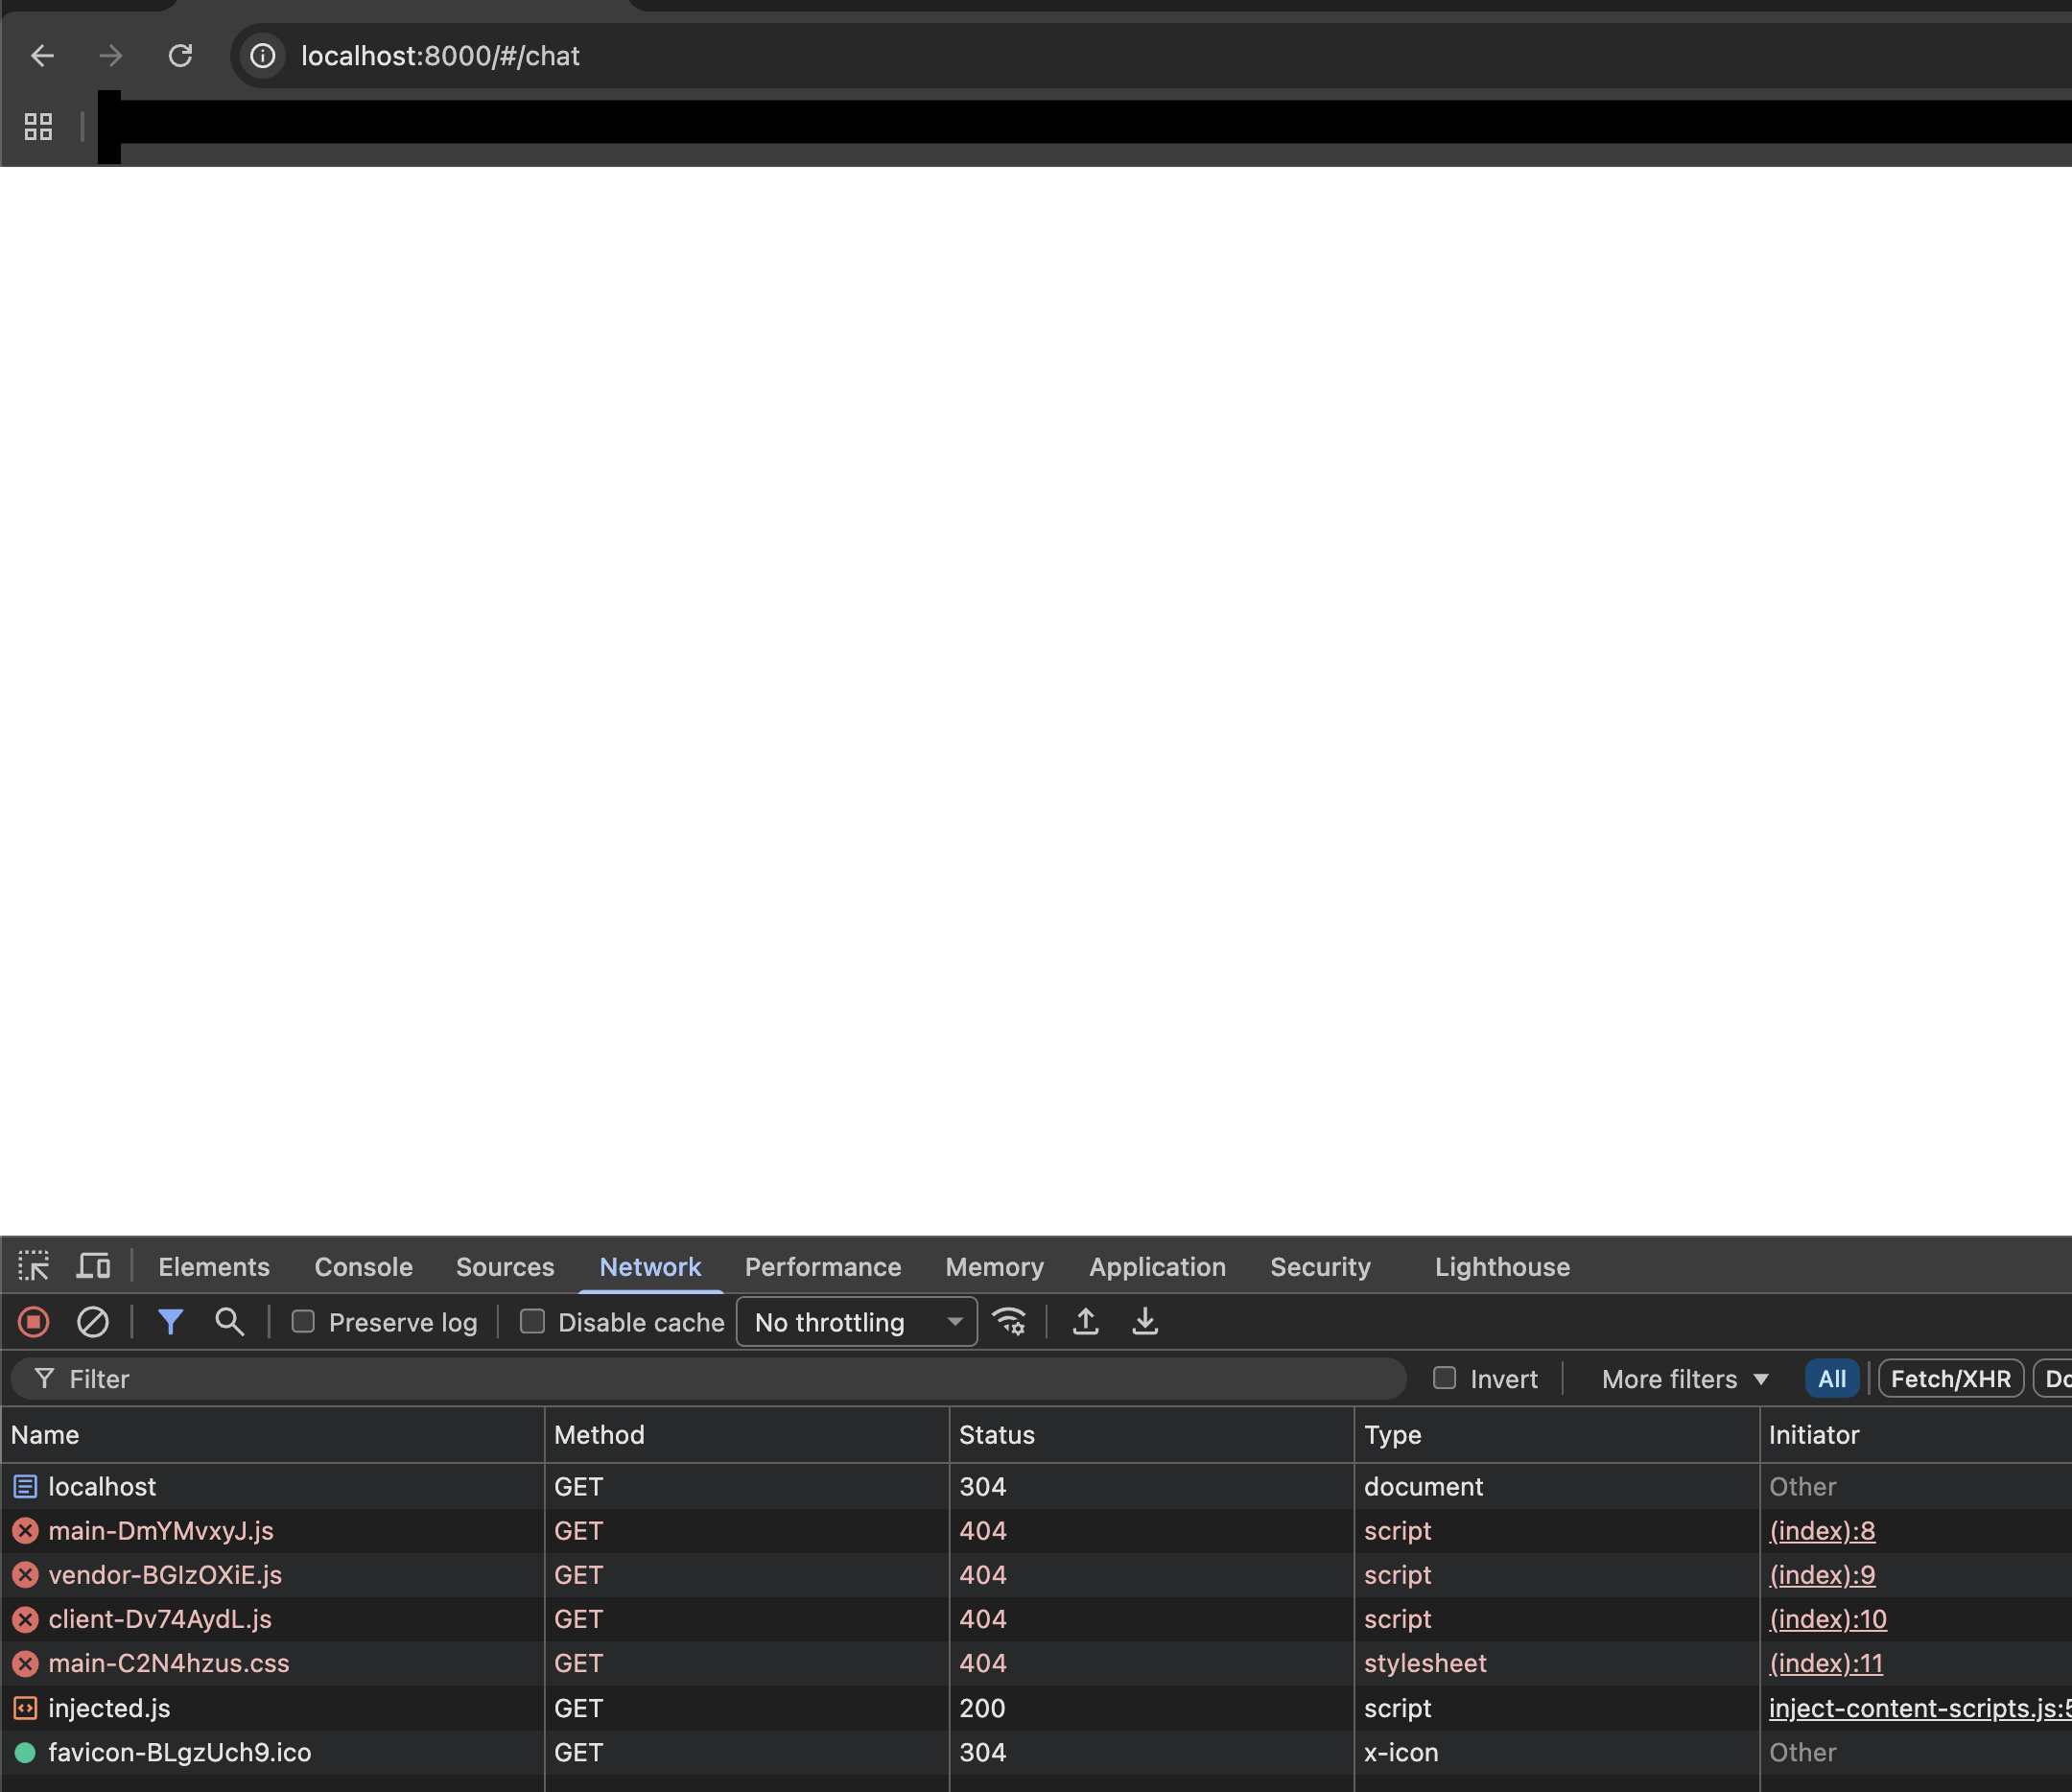
Blank page or 404 errors for UI assets (stale browser cache):
If the Console UI loads as a blank page and the browser DevTools Network tab shows 404 errors for .js or .css files, the browser is serving cached assets from a previous installation. This is common after a reinstall.
Open the URL in a private/incognito window, or perform a hard refresh to bypass the cache.
Agent timeouts:
Performance of the embedded PostgreSQL and SeaweedFS is heavily dependent on the underlying disk I/O. Standard HDD-backed storage causes agent timeouts. If you experience this, configure a faster StorageClass for the persistence layer:
| Provider | StorageClass |
|---|---|
| AWS EKS | gp3 |
| Azure AKS | managed-csi-premium |
| Google GKE | pd-ssd or hyperdisk-balanced |
persistence-layer:
  postgresql:
    persistence:
      storageClassName: "gp3"
  seaweedfs:
    persistence:
      storageClassName: "gp3"
Local Kubernetes (Apple Silicon / Podman)
These issues affect local Kubernetes environments running on Apple Silicon with rootless Podman. Cloud Kubernetes deployments are not affected.
nofile limit too low (rootless Podman)
Rootless Podman caps nofile at 524,288, which is below the 1,048,576 minimum required for broker startup. The broker pod may start but fail silently. Fix this by raising the limit in both containers.conf and a systemd override inside the Podman VM:
-
Edit
~/.config/containers/containers.conf:[containers]default_ulimits = ["nofile=1048576:1048576"] -
Inside the Podman machine (
podman machine ssh), create a systemd drop-in:sudo mkdir -p /etc/systemd/system/user@.service.dsudo tee /etc/systemd/system/user@.service.d/nofile.conf <<EOF[Service]LimitNOFILE=1048576EOFsudo systemctl daemon-reload -
Restart the Podman machine:
podman machine stop && podman machine start
Pod-to-pod DNS broken (minikube default CNI)
Minikube's default CNI breaks pod-to-pod DNS on this stack. Start minikube with --cni=calico:
minikube start --cni=calico <other-flags>
See minikube issue #18978 for details.